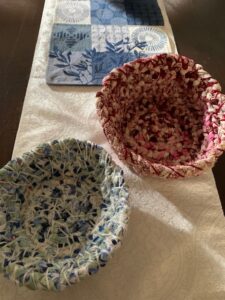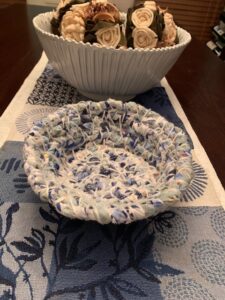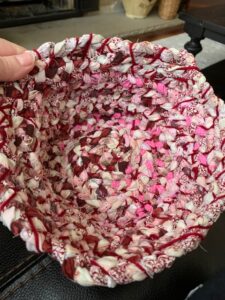


I was looking for a project to de-stash my fabric and thought I would try making a braided fabric basket. I used around 2 yards of fabric for each of these baskets and used up some older fat quarters and longer strips from my scrap bin. I sorted them into coordinating colors then cut them into roughly 2 inch strips. I really liked how they turned out. I have a lot of blue tones in my home so that was my color pallet inspiration for the first one. The second one was made from pink and red fabrics because I thought it would look nice on my table for Valentine’s Day. It was actually a pretty easy process and I was able to create a basket from start to finish within a few hours. I actually made the pink and red basket while watching a movie one evening. Below is the process I used to build my baskets.
Materials needed:
Two yards of fabric (it can be a mix of fat quarters, strips or other leftover fabric), upholstery needle, sewing needle, sewing thread, yarn, 2 bobby pins, scissors, rotary cutter (optional)
Cutting:
Collect all your fabric. Cut fabric into 2 inch strips or similar size. Small variations are fine. It works best if your strips are not all the same length to avoid the seams being too bulky when adding another strip. You do not want to be joining a new piece of fabric at the same time with all three tails of your braid. Lay strips of fabric in similar color piles so you can easily grab them once you start braiding.
Braiding:
Find 3 different color and different length strips of fabric. Fold the end of each strip twice so it measures around a half inch in size. Pin the three strips together at the end. This is where you will start your braid. You can also sew the end of the braid for more stability. Before you start braiding you will need to secure the end of the fabric. You can hook it on the spindle on your sewing machine, tape it to a table or even pin it on your jeans. You can use whatever works best for you and secures the fabric so you can easily braid your strips. Start braiding until you have about 3 inches of fabric left. Then, you can either lay another strip inside and wrap it tightly together and continue braiding or sew the next strip with at least a half inch overlap. if your basket it braided fairly tight you can braid without needing to sew. Just overlap your strips 2-3 inches and fold them tightly. Continue the braiding process until you have a few yards worth of braided fabric.
Building your basket:
Once your long braid is complete, it is time to build your basket. Decide if you want to build a round or oblong basket. Use the pinned/sewn end of your braid to start building the bottom of your basket. Simple fold the braid so the flat sides line up and start sewing the braids into a coil so it looks like a coaster. Keep sewing your basket bottom until you get to your desired size. You can choose to use a traditional sewing needle and thread or you can use the upholstery needle and yarn. You can weave in and out of the breaded strips or wrap the yarn all the way around the entire braid and the previous braid if you want more yard to show. It is all personal preference. Once you have the bottom to the desired width you can start building the sides of your basket. Take the braided strip and tilt 90 degrees so it is on top of the previous braided strip. Continue to sew the flat side of the braid around the basket until your desired height. You can change the angle that you sew if you want a flared out basket. If you want a handle on your basket stop sewing for a few inched, add and inch or two onto the braid, then continue to sew. There should be a gap where you can easily grab the basket. Continue around the basket a few more times so your handle is at least 3 braided strips thick.
Finishing your basket:
Once you have the desired height of your basket you need to taper the braid so it is slight smaller. I just trimmed the strips in half for a few inches, braided them and sewed them. I sewed the ended of that braid then tucked it into one of the larger braids so you did not see the end. There you have it. A fun braided basket.

